Tactical Navigation: Mastering Land Navigation Without Modern Tech in Hostile Environments

The Tactical Case for Low-Tech Navigation
In a permissive environment with full battery life and clear sky, GPS is fast and convenient. In a hostile environment — degraded communications, EMP threat, jammed signals, damaged equipment, or simply terrain that cuts satellite access — it’s a liability waiting to manifest. A navigator whose skill set begins and ends with a device has no fallback when that device fails.
Military land navigation training exists precisely because electronics fail in the worst conditions. Extreme cold degrades batteries. River crossings kill devices. Enemy jamming renders GPS unreliable. The skills in this guide — map reading, compass work, triangulation, terrain association, and adverse-weather adaptation — are what remain when everything else has been stripped away.
They are also, practically speaking, the skills that build genuine spatial reasoning: the ability to hold a three-dimensional model of terrain in your head, anticipate what’s coming before you arrive, and make sound route decisions under pressure. No app builds that. It comes only from practice with map and compass in real terrain.
Navigation hierarchy — primary to emergency:
— Primary: Map + compass + terrain association (always available, no battery)
— Supplement: GPS confirmation of known position (when available and mission-appropriate)
— Emergency: Celestial / natural cues (no equipment required)
— Distress: Satellite messenger / PLB (last resort — sends your position to rescue services)
Each tier is a fallback for the one above. Training all four ensures you are never without a navigation option.
Topographic Map Mastery: Reading Ground Before You Stand On It
A topographic map compresses three-dimensional terrain into a two-dimensional surface using contour lines — imaginary lines connecting points of equal elevation. Every line on the map represents a specific height. The vertical distance between lines is the contour interval, printed in the map legend. Close lines mean steep terrain. Widely spaced lines mean gradual slope. Lines that close on themselves indicate a summit or depression.
The operational value of this is significant: a competent map reader can predict the physical effort of a route, identify chokepoints, find covered approaches, locate water, and avoid cliff faces — all before moving a single step. That predictive capability is what separates tactical navigation from wandering with a compass.
Recognizing the six major terrain features
Scale, distance, and route planning
Map scale determines how much real-world distance one inch — or one centimeter — of map represents. A 1:24,000 scale (common USGS 7.5-minute series) means one inch equals 24,000 inches, or 2,000 feet, on the ground. A 1:50,000 scale covers more area with less detail — the standard for military tactical maps. Knowing your scale lets you estimate travel distances, plan rest points, and calculate how much daylight a route requires before you commit to it.
Distance measurement on a map is done by placing a piece of paper along the planned route, marking each significant bend, then measuring the total against the map’s scale bar. On straight segments, a ruler works directly. For irregular routes, a piece of string conforms to the curves and can then be measured against the scale.
Mark your map before you move, not while you’re moving. Identify your start point, planned route, key terrain features to look for, probable hazard zones (cliff lines, dense draws, water obstacles), and a bail-out route. Annotate them in pencil before departure. Decision-making in motion under fatigue or low visibility is far less reliable than decisions made at a table with good light.
Compass Fundamentals: Bearings, Declination, and Precision Movement
A compass provides one thing: a reliable reference to magnetic north. Everything else — following a bearing, locating yourself on a map, correcting for declination — is technique applied to that single reliable input. The technique can be taught in a day. Trusting it under pressure takes consistent field practice.
Setting and following a bearing
A bearing is a direction expressed in degrees from magnetic north (0°–360°). To set one from a map: lay the compass baseplate between your current position and your destination, rotate the housing until the orienting lines align with the map’s grid north, and read the degree value. Lift the compass, level it, and rotate your body until the magnetic needle sits inside the orienting arrow. The direction-of-travel arrow now points toward your destination. Sight a landmark in that direction, stow the compass, move to the landmark, and re-sight. Never walk staring at the compass — you will drift, trip, and fail to observe the terrain ahead.
Magnetic declination: the error that compounds
Magnetic north (where the compass points) differs from true north (map north) by a local declination value measured in degrees. This value is printed in the margin of every topographic map. In the continental U.S., it ranges from approximately 20° east in the Pacific Northwest to 20° west in Maine. Uncorrected, 10° of declination error translates to roughly 175 meters of positional drift per kilometer traveled — nearly 900 feet off target in a mile. Over five miles, that’s a navigational failure by any standard. Adjust for declination before every navigation exercise, and verify the value is current — declination shifts by approximately 0.1° per year in most locations.
Navigating without a compass
When a compass is unavailable, the natural environment provides directional references — less precise but sufficient for maintaining general orientation. The sun’s position at solar noon indicates south in the Northern Hemisphere (the shortest shadow of the day points north). Polaris marks true north to within 1° at night. Moss and lichen grow more densely on the north sides of trees and rocks in the Northern Hemisphere, though this rule has notable exceptions in dense or north-facing terrain. These methods are backup systems, not substitutes — use them to confirm direction, not to set precise bearings.
Advanced Techniques: Triangulation and Off-Trail Navigation
Basic compass work keeps you on a bearing. Advanced technique tells you precisely where you are when you’ve lost track, and keeps you there when the terrain offers no obvious landmarks. These are the skills that separate competent navigators from reliable ones.
Triangulation: fixing your position from known landmarks
Triangulation (more precisely, resection) solves the “I know where I am relative to landmarks, but I don’t know where I am on the map” problem. It requires two or three identifiable landmarks that also appear on your map.
Off-trail navigation: maintaining bearing over distance
Moving cross-country without trails demands that you stay on your bearing despite obstacles — ravines, dense brush, deadfall, water — that force detours. The tactical approach is to sight a landmark in the direction of travel, detour around the obstacle without changing the compass, and rejoin the original bearing line on the far side by walking an equal and opposite offset. If you walk 50 meters right to avoid an obstacle, walk 50 meters left after passing it before resuming your bearing. Failure to offset correctly introduces cumulative drift that compounds over distance.
Aiming off deliberately — setting a bearing several degrees to one side of your target so you hit a linear feature (trail, stream, ridgeline) and know definitively which direction to turn — is one of the most reliable techniques in off-trail navigation. Without aiming off, arriving at a linear feature leaves you uncertain whether your target is to the left or right. With aiming off, you always know.
Off-trail movement checklist — before you leave the last confirmed position:
— Bearing confirmed and set on compass housing
— Distance to next waypoint estimated and noted
— Pace count reset to zero
— Aiming-off direction decided (left or right of target)
— Bail-out bearing identified if objective cannot be reached
— Landmark sighted in the direction of travel for first leg
Night Navigation: Moving in the Dark Without Compromising Position
Night navigation is not a different skill — it’s the same map and compass work executed with degraded inputs: no visible terrain features at distance, no color contrast between terrain types, reduced depth perception, and no ability to confirm landmarks visually. The compensation is procedural rigor. What you can’t see, you substitute with pace count, bearing discipline, and pre-planned waypoints identified during daylight map study.
Reducing light signature and preserving night vision
Human eyes take 20–40 minutes to fully dark-adapt. A single white light exposure resets that adaptation completely. Use red-light headlamps for all map and compass work at night — red light does not significantly degrade scotopic (dark-adapted) vision and is less detectable at range. Keep the light pointed at the map surface, never sweep it across terrain or tree lines. Cover the headlamp lens with your palm when checking your compass dial to minimize light cone spread.
Celestial navigation at night
Polaris is your primary north reference in clear conditions. Find the Big Dipper, extend a line from the two pointer stars at the outer edge of the bowl roughly five times their separation distance — that star is Polaris. In the Southern Hemisphere, the Southern Cross serves the same function, indicating south. The moon’s position and phase provide rough directional references: before midnight, the moon tracks west; after midnight, it moves east ahead of sunrise. These are supplementary — use them to confirm compass bearings, not replace them.
Night vision equipment considerations
Night vision devices — image intensifier tubes and thermal — significantly expand capability in low-light environments but introduce specific limitations. Image intensifiers compress depth perception and reduce effective recognition range compared to daylight. Thermal devices show heat signatures but do not resolve fine terrain detail. Both require daylight familiarization before operational night use, as navigating with NVGs while unfamiliar with their field-of-view distortion introduces significant trip and fall risk on uneven terrain. Map reading under NVGs requires illuminated maps or a low-output IR light source paired with a device that can resolve it.
Adverse Weather Navigation: Fog, Rain, and Snow
Weather degrades three of the four inputs you rely on for navigation: visibility (fog, heavy rain), landmark recognition (snow cover obscuring terrain), and physical capacity (cold, wind, and fatigue compressing the margin for error). The navigator’s response is not to wait for better conditions — it’s to shorten the planning horizon, increase check frequency, and reduce reliance on visual confirmation that the environment no longer provides.
- Shorten legs to 50–100 meters between check points — only navigate to what you can actually see
- Rely entirely on compass bearing and pace count; do not trust landmark recognition
- Use sound: running water, breaking surf, or traffic noise provides directional information when vision fails
- Follow terrain features by touch where possible — a ridge crest underfoot requires no visibility
- Stop and confirm position at every terrain feature contact before proceeding
- Waterproof the map before rain arrives, not after — a wet map tears and smears within minutes
- Mark your current position in pencil before stowing the map so you don’t need to unfold it in heavy rain
- Swollen streams change the tactical situation — identify crossing points before they rise, or route around them
- Follow water flow downhill as a navigation aid when other landmarks are obscured
- Pre-plan your route using high-ground ridgelines that remain navigable regardless of water level
- Contour patterns under snow still track ridgelines and valleys — use terrain shape, not surface features
- Aspect (which direction a slope faces) becomes your primary terrain indicator — snow depth differs dramatically between north and south aspects
- Keep the compass against your body to maintain needle function in extreme cold — cold reduces needle response speed
- Plan routes using ridgelines to avoid avalanche terrain in mountain environments
- Reduce daily distance objectives and increase margins — energy expenditure in snow is significantly higher than equivalent summer terrain
Cold-weather navigation failure mode: Cold hands cannot manipulate a compass reliably. In sub-zero conditions, fine motor skills degrade rapidly — your ability to set a precise bearing, read a degree marking, or unfold a map without dropping it is compromised within minutes of bare-hand exposure. Warm your hands before critical navigation tasks. Keep the compass and map in a chest pocket against body heat, not in a pack or outer pocket.
Technology’s Role: Supplement, Not Substitute
Electronic navigation tools have legitimate roles in the modern field kit — as long as their roles are defined precisely. The failure pattern is treating a device as a primary navigation system rather than a confirmation and communication tool. When the device fails (and all devices eventually fail), the navigator without underlying skill is lost. The navigator with underlying skill simply returns to primary.
Carry spare batteries for any device that requires them. Know exactly how long your GPS runs on a set, and carry at least one spare set per operational day. A GPS that dies at kilometer three of a ten-kilometer movement is worse than no GPS at all — it produces false confidence that collapses the moment it powers off.
Preparedness and Continuous Skill Development
Navigation skill degrades without use. A course or weekend exercise builds the foundation — consistent practice maintains it. The most effective training method is deliberate practice in familiar terrain where errors are immediately detectable: navigate a known route using only map and compass, verify your position at each waypoint, identify where you drifted and why. Known-terrain practice is more useful than unknown-terrain practice for diagnosing technique errors, because you can confirm exactly when and where the error occurred.
Pre-mission planning standards
Every movement in unfamiliar or hostile terrain requires minimum pre-planning: route drawn on the map with key terrain features annotated, distance and estimated travel time calculated, primary and alternate routes identified, hazard zones (water obstacles, cliff lines, exposed ridgelines) marked, and a communication plan established with a person who knows your route and expected return time. None of this requires electronics. All of it requires map time before you step out.
Physical and mental contingency planning
Navigation plans must account for degradation — of weather, of physical condition, of available daylight. Build in margin. A route that works perfectly under ideal conditions with full energy is a route that fails when one variable changes. Conservative distance objectives, known bail-out routes, and pre-identified emergency shelter terrain are not excessive planning — they are the difference between a difficult day and a search-and-rescue event.
Brief someone who isn’t going with you. Before any navigation exercise or field movement, give someone who will stay behind your full route, planned checkpoints, expected return time, and a specific trigger — “If I haven’t contacted you by 1800, call this number.” That person is your backup system for the backup systems. It costs five minutes and has ended searches before they became recoveries.
Compare Products: Three Compass Options Across Price and Capability
The right compass depends on your navigation context and budget. The three options below cover the full civilian-to-military spectrum: a functional entry-level option for training and casual field use, a mid-tier military phosphorescent compass for reliable field use without the premium tritium price, and the tritium standard — the compass used by U.S. military personnel for over four decades.
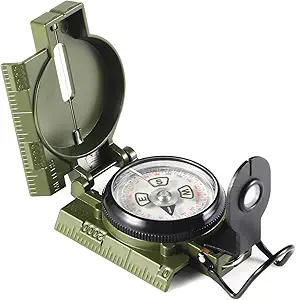
- Price$22.39
- HousingAluminum
- Dimensions4.0 × 3.3 × 2.1 in
- Inclinometer✓ Yes
- Waterproof✓ Yes
- IlluminationNone
- Mil-SpecNo
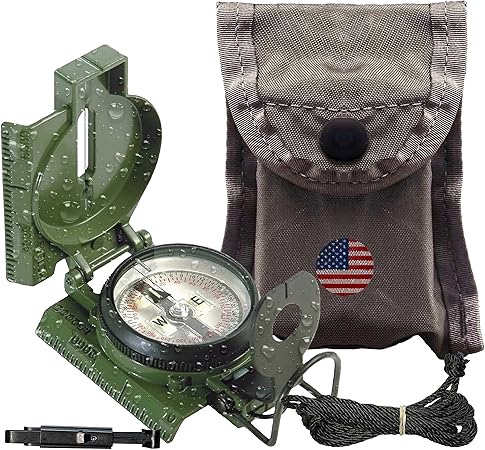
- Price$110.29
- HousingAluminum — mil-spec
- Weight209 g (7.4 oz)
- Dimensions19.1 × 14 × 5.5 cm
- IlluminationPhosphorescent
- Waterproof✓ Yes
- Mil-Spec✓ Official US Military
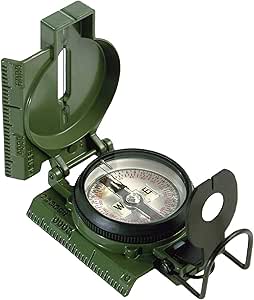
- Price$244.61
- HousingAluminum — mil-spec
- Weight191 g (6.7 oz)
- IlluminationTritium — always on
- Glow Duration12+ years continuous
- WaterproofCheck specs
- Mil-Spec✓ Official US Military
- Always-on tritium illumination
- Mil-spec aluminum housing
- Lensatic sighting system
- Official US military spec
- Mil-spec aluminum housing
- Phosphorescent dial
- Inclinometer built-in
- Aluminum housing, waterproof
- Training and backup use
- National Geographic Trails Illustrated
- USGS 7.5-minute series
- CalTopo custom print
- All-weather paper — pencil and pen
- Multiple formats (grid, blank, topo)
- Fisher Space Pen or standard pencil
- Garmin inReach Mini 2
- SPOT Gen4 messenger
- ACR ResQLink PLB (no subscription)