Casualty Movement in Remote Terrain: Drags, Carries, and Improvised Litters That Actually Work
When You Should (and Shouldn’t) Move a Casualty
You’ve probably heard the phrase, “Don’t move them-you’ll make it worse.” In remote terrain, that advice is only half true. Sometimes staying put is safest. Other times, not moving is what actually kills people (think rockfall exposure, an avalanche path, rising water, incoming lightning, or hypothermia setting in).
Related Articles:
The practical goal is simple: move only when the benefit clearly outweighs the risk. That sounds obvious, but stress makes people impulsive. It’s easy to get emotionally hijacked and start hauling someone uphill just because it feels like you’re “doing something.”
Your job is to make a calm, defensible call-one your future self will still agree with.
Immediate danger vs. medical risk
If the casualty is in immediate danger-like in the runout of a slide path, under unstable rocks, on a narrow roadway, or in surf-moving them a short distance to a safer spot is usually the right call. You don’t need a perfect technique here. You need fast, controlled, and “good enough.”
If the scene is stable, you’re balancing medical risks. Movement can worsen bleeding, increase pain, aggravate a suspected spine injury, or turn a manageable fracture into something uglier. The answer isn’t “never move.” The answer is package first, then move smart.
⚠️ Warning: If you suspect a spinal injury, avoid twisting, bending, or yanking. But don’t let “spine” become a freeze response if you’re in a lethal environment.
A quick decision filter you can actually use
When you’re tired and stressed, you need a short checklist-not a textbook. Run this quick filter and commit to the result.
Move now if:
- [ ] The location is actively dangerous (falling rocks, avalanche risk, fire, rising water, traffic)
- [ ] Weather exposure will likely cause rapid decline (cold rain + wind + immobility is a classic)
- [ ] You must reach communications or a landing zone and the casualty can’t stay warm/safe where they are
Delay movement (and package first) if:
- [ ] The scene is stable and you can shelter in place
- [ ] The casualty has uncontrolled bleeding you haven’t addressed
- [ ] You don’t have enough people or strength to move without dropping them
Cold is a huge driver in remote evacuations. Once someone is injured and not moving, they lose heat fast-even in “not that cold” conditions. The CDC’s overview on how hypothermia develops is worth a skim: CDC hypothermia guidance.
With that decision made, the next step is choosing a method that matches your terrain and your team.
Terrain, Time, and Team: The Movement Decision That Sets Everything Else Up
Before you pick a drag or carry, you need a movement plan that matches reality. Terrain decides what “works,” and your team decides what’s even possible. If either one doesn’t line up, you’ll stall-or worse, you’ll drop the casualty.
A common mistake is choosing a technique because it looks cool or because you practiced it on flat ground. In remote terrain, “best” usually means least likely to fail when you’re exhausted.
The terrain audit (what you’re really looking for)
Do a quick scan in three directions: where you are, where you want to go, and the route between. You’re not looking for the ideal route-you’re looking for the route you can execute safely under load.
Focus on:
- Slope and footing: mud, scree, wet roots, talus, snow crust-each changes how stable you’ll be under weight
- Width and obstacles: narrow trail with brush favors a drag or single-file carry; open ground may favor a litter
- Micro-hazards: creek crossings, step-down ledges, loose rock, deadfall
- Rest platforms: flat spots every 30-100 yards where you can reset grip and check the casualty
Practical example: If you have a steep sidehill with loose gravel, a two-person carry can be a disaster because your inside foot is always slipping. A controlled drag with the casualty low to the ground can actually be safer, even if it’s slower.
Time pressure: daylight, weather, and fatigue
Time pressure isn’t just “we want to get out.” It’s the hard math of daylight, temperature, and your group’s energy. If you ignore that math, you’ll end up making desperate decisions later.
If you have two hours of daylight and no shelter, your plan must be conservative and repeatable. A technique that requires perfect timing between two rescuers will break down once you’re both smoked.
If weather is turning-wind picking up, rain starting, temperature dropping-prioritize reaching tree cover or a sheltered depression before attempting a long movement. This is also where your packaging choices matter: windproofing and insulating buys you time.
Team reality: strength, numbers, and skill
Count your actual movers. Not “the people who are here,” but the people who can safely move weight for 20 minutes. Someone may be emotionally present but physically done.
Also assign roles so the movement doesn’t turn into a noisy, uncoordinated mess:
- One person managing the casualty’s head/upper body
- One or two movers
- One navigator clearing the route and calling hazards
- One person handling comms and timekeeping
If you’re short-handed, choose techniques that don’t require constant synchronization.
At-a-glance comparison: drag vs. carry vs. litter
This isn’t the full “how-to” yet, but it helps you pick a direction before you commit.
| Option | Best Use | Biggest Advantage | Biggest Risk | Typical Speed |
|---|---|---|---|---|
| Drag | Tight terrain, solo/2-person, short moves to safety | Low complexity, low lift | Abrasion, snagging, poor control on steep drops | Slow-moderate |
| Carry | Short distances, clear footing, strong movers | Faster, better obstacle clearance | High rescuer fatigue, drop risk | Moderate-fast |
| Improvised litter | Longer distances, 3-6 movers, smoother trail | Best patient comfort/control | Build time, needs manpower | Moderate |
📝 Quick Summary: Terrain and manpower usually decide your method more than the injury does. Don’t fight physics-work with it.
Once you’ve matched method to terrain, the next limiter is usually your own body mechanics.
Body Mechanics That Keep You From Becoming the Second Casualty
If you injure your back or blow out your knees, your group’s problem just doubled. Casualty movement is high-risk because it’s awkward, uneven, and performed under stress. The goal is to move the casualty without sacrificing your own stability.
The unsexy truth: your technique matters less than your consistency. You want movements you can repeat without surprises.
Lift principles that apply in the real world
You already know “lift with your legs,” but remote terrain adds wrinkles. You’ll deal with uneven footing, twisting, and sudden shifts when the casualty moans or spasms.
Use these rules:
- Keep the load close. The farther the casualty is from your centerline, the more leverage on your spine.
- Avoid twisting under load. Turn your whole body, even if it takes an extra step.
- Use micro-rests. Reset your grip every 20-60 seconds instead of waiting until you’re shaking.
- Use simple commands. “Ready-lift-step-down” beats a full conversation.
If you want a reminder of why awkward lifts are so risky, OSHA’s guidance is a useful reference: OSHA lifting and ergonomics resources.
Footwork on slope: the detail people skip
On hills, your feet are the system. If your feet fail, everything fails.
Try this:
- Shorten your steps and keep your knees slightly bent
- Set your uphill foot before moving the downhill foot
- Don’t “hop” down ledges while holding weight-lower the casualty first (even inches), then step
If you’re moving downhill, assume you’ll slide at least once. Plan for it. That might mean choosing a drag where a controlled slide is acceptable rather than a carry where a slide turns into a drop.
Breathing and pacing (so you don’t gas out)
When you hold your breath, you spike fatigue and lose coordination. That’s when people trip.
Use a simple pacing rule: move for 30-90 seconds, rest for 15-30 seconds. During rests, check the route, adjust grips, and confirm the casualty is still packaged.
💡 Pro Tip: If you’re the strongest mover, don’t “hero” the whole thing. Put your strength into *stability and consistency*, not into sprinting the first 50 yards.
Now that your movement mechanics are dialed, you can make almost any technique safer by packaging correctly.
Packaging Basics Before Any Drag or Carry
Packaging is what turns “we dragged them out” into “we moved them without making them worse.” You don’t need fancy gear. You do need a repeatable sequence.
Think of packaging as three buckets: control the big killers, stabilize what will get worse, and protect against exposure.
Control what will kill them first
Before you move, address the problems that don’t tolerate delay:
- Major bleeding (direct pressure, packing, tourniquet if trained and indicated)
- Airway and breathing issues you can manage
- Shock management (positioning, warmth, calm reassurance)
You don’t need to be a clinician to do the basics well. The key is not skipping this step because you’re eager to start moving.
Stabilize the “movement multipliers”: head, hips, and limbs
Some injuries get dramatically worse with sloppy movement. Your goal isn’t perfection-it’s reducing gross motion.
- Head/neck: If you suspect head/neck injury, assign one person to keep the head aligned while others adjust gear. Don’t yank the casualty by the arms or shoulders.
- Hips/pelvis: Pelvic injuries can be serious, and movement can increase bleeding. If you don’t have a binder, prioritize careful, minimal movement and keep legs together.
- Long bone fractures: Splinting reduces pain and prevents the limb from flopping during a drag. Even a basic improvised splint (pad + rigid support + wraps) helps.
Prevent heat loss like it’s part of first aid (because it is)
In remote terrain, exposure isn’t a comfort issue-it’s a medical issue. The casualty is usually still, possibly wet, and stressed. All three accelerate cooling.
Start with the ground and wind:
- Get insulation under them (pad, pack, rope coils, spare clothing)
- Add a wind layer over them (rain jacket, tarp, emergency bivy)
- Cover the head if appropriate
The U.S. National Weather Service has a solid overview of wind chill (and why wet + wind is so punishing): National Weather Service wind chill information.
A simple “ready to move” checklist you can run in 30 seconds
Right before you start a drag or carry, do this quick scan.
Ready to Move Checklist:
- [ ] Bleeding controlled as best as possible
- [ ] Airway/breathing checked (quick look/listen)
- [ ] Casualty insulated from ground and wind
- [ ] Limb(s) secured so they won’t snag or flop
- [ ] Shoes/boots secured (or removed if they’ll snag badly)
- [ ] Route chosen with at least one rest platform
- [ ] One person designated to call commands
If you can’t check every box, that doesn’t mean you can’t move. It means you should expect problems and shorten the move to the nearest safe spot before re-evaluating.
The continuity point: choosing the first technique
At this stage, you’ve done the hard thinking-scene safety, route, manpower, and packaging. Now you’re ready to pick the first movement method that fits your constraints.
Next, you’ll move from planning to execution: drags that behave in brush and on slopes, plus carries you can sustain without burning out.
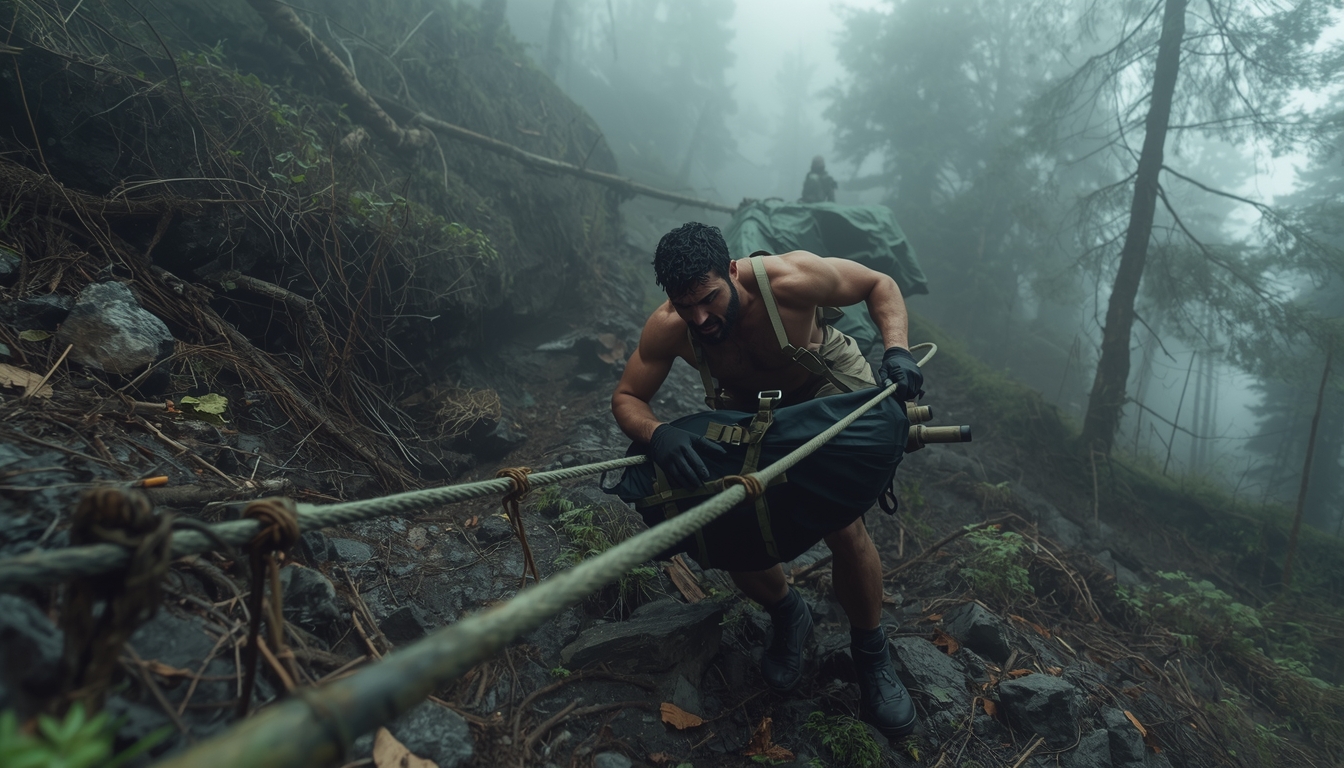
Drags That Work When the Trail Is Too Narrow (or You’re Too Short-Handed)
Drags get a bad reputation because people picture someone getting scraped over rocks like a cartoon. In reality, a well-set drag is often the safest option when you’re solo, when the trail is tight, or when footing is sketchy and lifting would cause a fall.
The goal isn’t speed. It’s controlled movement with minimal starts, stops, and drops. If you can keep the casualty low, stable, and sliding predictably, you’ll usually beat a wobbly carry.
Clothing-and-shoulder drag (the fastest “get to safety” move)
This is the drag you use when you must move now-rockfall, incoming waves, active traffic, or a tree that’s about to come down. It’s also one of the simplest techniques to teach a panicked bystander.
Step-by-step:
- Get behind the casualty’s head and shoulders.
- Grab their clothing at the shoulders/collar (or hook your forearms under their armpits if clothing will rip).
- Keep their head supported between your forearms as much as you can.
- Walk backward with short steps, scanning behind you every couple of steps.
This drag is rough on the casualty’s back and hips, but it’s reliable under stress. If the ground is abrasive, put something under their torso first (jacket, empty pack, foam pad) to reduce snagging.
⚠️ Warning: Avoid dragging by the wrists or ankles unless there is no other option. It’s easy to dislocate a shoulder or worsen an unseen fracture.
Pack-strap harness drag (best “low-tech upgrade”)
If you have even 30 seconds, build yourself a harness so your legs do the work instead of your biceps. This is a sweet spot for one-rescuer movement on a trail.
Backpack method:
- Loosen the shoulder straps and waist belt fully
- Rotate the pack so the shoulder straps face the casualty
- Feed the casualty’s arms through the shoulder straps like they’re “wearing” the pack (the pack sits on their chest/upper belly)
- Clip the sternum strap (if available), then secure the waist belt around the pack and casualty to prevent slip-out
- Grab the pack’s haul loop/top handle and drag
Why it works: the casualty’s torso is “captured,” so you’re not constantly re-gripping. On moderate terrain, you can add webbing/rope to create a longer towline and keep your feet away from the casualty’s head.
Practical example: on a narrow singletrack with roots and tight turns, this keeps the casualty aligned with the trail. You can steer them like a sled.
Tarp, poncho, or sleeping-pad drag (the abrasion solution)
If the surface is rough (scree, granite, lava rock) or sticky (mud, wet vegetation), you want a low-friction layer under the casualty. A tarp or poncho is ideal, but a foam sleeping pad works surprisingly well.
Quick build:
- Lay the tarp/poncho/pad next to the casualty
- Roll the casualty onto it using a coordinated roll
- Pull excess material up around their sides like a burrito (even a partial wrap helps)
- Create a tow point by tying corners or clipping a carabiner through gathered material
If you have cord/webbing, add a towline long enough that you’re not stepping on the casualty. If you don’t, grab the bundled material at the head end and keep the pull low and steady.
💡 Pro Tip: If you’re dragging downhill, keep the towline *shorter* than you think. A long line lets the casualty build speed, turning a controlled slide into a runaway.
Drag options at a glance
Use this quick table to choose a drag that matches the ground in front of you.
| Drag Type | Best Terrain | What You Need | Main Benefit | Main Problem |
|---|---|---|---|---|
| Clothing/shoulder drag | Immediate danger, flat-ish ground | Nothing | Fastest start | Abrasion + rescuer fatigue |
| Pack-strap harness drag | Trails, moderate slope | Backpack | Good control, less arm strain | Setup takes 30-60 seconds |
| Tarp/poncho drag | Scree, rough rock, mud | Tarp/poncho | Less snagging, smoother slide | Harder steering in brush |
| Sleeping pad drag | Snow, grass, mixed ground | Foam pad | Better insulation + glide | Pad can taco/fold on obstacles |
If drags are your low-lift option, carries are your obstacle-clearing option. The key is picking the carry your team can actually maintain.
Carries You Can Sustain Without a “Hero Phase” and a Crash
Carries are great when you must clear obstacles-deadfall, boulders, tight gullies-or when dragging would jam every five feet. The catch is that most carries fail for one reason: they demand more strength and coordination than your team actually has.
If you choose carries you can still perform at minute 20, you’ll make faster progress overall. If you choose a carry that burns you out in three minutes, you’ll stop, fumble, and eventually drop the casualty.
Two-person fore-and-aft support (the workhorse for rough trails)
If the casualty can bear some weight (even just standing with help), this is one of the safest and most efficient options. It’s basically a guided walk with two rescuers acting as a human frame.
How to run it:
- One rescuer stands behind the casualty, arms under armpits, hands clasped across the chest
- The second rescuer faces the casualty, supporting forearms or a belt/strap at the waist
- Move one step at a time with clear commands: “Step… step… stop.”
This works well for ankle injuries, stabilized leg injuries, or exhaustion cases. It also preserves warmth and morale because the casualty is upright and moving.
Common mistake: letting the casualty “hang” on your neck. Keep shoulders down and spine neutral-your forearms do the holding, not your traps.
Two-person seat carry (effective, but only on predictable footing)
The classic two-person seat is solid when you have a short distance to cover on a decent surface. Think: crossing a stream bank, moving from a fall site to a flat staging area, or navigating inside a shelter.
Basic build:
- Each rescuer makes a “seat” with their arms (four-hand grip or a secure wrist grip)
- The casualty sits back into the seat and places arms around rescuers’ shoulders (lightly-no choking)
- Move with synchronized short steps
Where it fails is uneven terrain. If one rescuer steps down unexpectedly, the seat collapses. If you’re on a sidehill with loose footing, switch to a drag or a litter plan.
📝 Quick Summary: Seat carries are great for *crossing* obstacles, not for *traveling* over obstacles.
Fireman’s carry vs. “over-the-shoulder” reality
You’ll see the fireman’s carry in movies and sometimes in training environments. In remote terrain, it’s usually a last-resort option unless you’re exceptionally strong and the route is clean.
Here’s why: your center of gravity is high, your vision is limited, and one slip can put both of you on the ground. It can also compress the casualty’s torso and make breathing harder.
If you do use an over-the-shoulder carry:
- Keep it short (to the nearest flat spot)
- Avoid it if the casualty has chest trauma, breathing issues, or significant spine/hip concerns
- Use a spotter walking close to stabilize you and clear the route
For many groups, a pack-strap drag will outperform a fireman’s carry in safety and endurance.
One-rescuer “strap assist” carry (when the casualty can hop)
This is a quiet problem-solver when the casualty can use one leg but needs balance and offloading. A simple strap (webbing, belt, sling, even a jacket tied into a loop) becomes a stable handhold.
How to set it:
- Make a loop and place it around your shoulders like suspenders, or hold it across your body
- The casualty holds the strap with both hands for balance
- You walk slightly ahead, setting pace and direction
This reduces the death grip on your shoulders and prevents the casualty from pulling you off-balance.
Carries work best when you can transition cleanly. That brings us to the moment most evacuations go sideways: switching methods mid-route.
Drag-to-Carry Transitions: Switching Methods Without Chaos
In real evacuations, you rarely use one method for the whole route. You might drag through brush, carry over deadfall, then drag again across a meadow. The transition moments are where injuries and drops happen.
The fix is to treat transitions like mini-operations: stop, stabilize, reset grips, then move.
The 20-second reset drill
Any time you feel technique breaking down-slipping feet, failing grip, rising panic-run a reset. It’s fast, and it prevents compounding errors.
Do this:
- Call “Stop” and set the casualty down gently
- Check airway/breathing visually (quick look/listen)
- Confirm straps/blankets/splints haven’t loosened
- Re-evaluate the next 30-50 yards: drag-friendly or carry-friendly?
- Restart with clear commands
This isn’t overcautious. It’s how you avoid the “we pushed too far and dumped them” moment.
Common terrain triggers that tell you to switch
You don’t need perfect judgment-just predictable rules.
Switch from carry → drag when:
- Movers are gassing out and steps are getting sloppy
- The trail narrows and hips/shoulders keep clipping brush
- The slope becomes a sidehill and the downhill foot keeps sliding
Switch from drag → carry when:
- The casualty is snagging every 3-5 feet
- You must step over repeated deadfall/rocks
- You’re approaching a creek crossing where a drag could dunk the casualty
Practical example: you’re dragging on a poncho along a muddy trail and hit a 2-foot log every ten yards. Instead of fighting it, do a short carry over each log (two-person seat or fore-and-aft), then return to the drag.
Downhill movement: controlled slide beats uncontrolled sprint
Downhill is where good intentions turn into speed. If the casualty starts sliding faster than you can manage, you’ll instinctively try to “save it” with a sudden stop. That’s where shoulder injuries and face impacts happen.
If you must go downhill:
- Keep the casualty’s feet downhill when possible (reduces head-first risk)
- Use a short towline or direct grip
- Assign a spotter below as a brake if terrain allows
Also watch heat loss. Downhill drags create wind exposure, especially if the casualty is wet. If you have an emergency bivy, it’s often worth deploying before the descent.
Once you’re comfortable switching methods, small gear tricks can dramatically reduce fatigue and improve control.
Improvised Harnesses, Knots, and Friction Tricks That Make Everything Easier
You don’t need a full rescue cache to improve your odds. A little cord, a couple straps, and smart friction management can turn an exhausting movement into something you can sustain.
This is the force-multiplier section. These changes won’t look dramatic, but they often make the difference between “we can keep going” and “we’re stuck.”
Towlines and attachment points (where people mess up)
If you add a rope or webbing towline to a drag, your attachment point matters. Clip too high (like a hood), and you’ll crank the casualty’s neck. Clip too low (like a boot), and you’ll flip them or twist them.
Aim for upper torso level:
- Around the shoulders
- A bundled tarp at shoulder height
- A pack harness secured across the chest
Quick knot guidance (simple and strong)
If you’re not a knot expert, don’t overcomplicate it. Choose knots you can tie correctly when your hands are cold.
- Use an overhand-on-a-bight to create a loop you can clip
- Use a bowline only if you know it well and can tie it under stress
- Back up slippery materials (like tarp fabric) by wrapping and tying multiple points, not just one corner
For a strong reference on rescue concepts and rigging fundamentals, see: NPS technical rescue and rigging resources.
Friction management: “slide better” without fancy gear
Your job is to reduce the energy cost per foot. That’s it.
Ways to do that fast:
- Put a rain jacket (slick side down) under hips/shoulders
- Use a foam pad under the torso and a second pad under the hips if available
- In snow, stomp and smooth the surface before dragging (30 seconds of prep can save 10 minutes of snagging)
In sandy terrain, don’t fight it by pulling harder. Widen the contact surface (tarp/pad) so the casualty doesn’t plow in.
Communication cues that prevent drops
When you’re tired, you’ll start talking in paragraphs. That’s when timing breaks.
Use a tiny command set:
- “Ready.” (everyone confirms)
- “Lift.” (single coordinated lift)
- “Step.” (one step at a time in technical spots)
- “Down.” (controlled set-down)
- “Stop.” (immediate freeze)
This matters most when you transition from drag to carry or step over obstacles. A two-second sync can save you from a ten-minute recovery.
💡 Pro Tip: Put one person in charge of commands even if they aren’t the strongest. The strongest mover should focus on stability, not leadership.
Natural continuation point: when drags and carries aren’t enough
At some point, you’ll hit the limit of what a drag or carry can do. Usually, it’s when distance increases, bumps matter, or you finally have enough people to share the load.
That’s when improvised litters stop being “nice to have” and become the smartest option.
Improvised Litters That Don’t Fall Apart (and Don’t Torture Your Team)
When drags and carries hit their limit, a litter is how you buy control, comfort, and endurance. The trick is building one that’s stiff enough to handle bumps-and simple enough that you don’t burn 30 minutes “crafting” while the casualty gets colder.
Your priorities are:
- A stable platform
- Solid handholds
- A way to keep the casualty from sliding out
If you nail those three, you’re already ahead of most improvised attempts.
Jacket-and-pole litter (fastest build with common gear)
This is the classic backcountry solution because it uses what groups actually have: trekking poles or sturdy branches plus jackets.
Build steps:
- Find two rigid poles about the same length (trekking poles fully extended, avalanche probes, or straight branches)
- Lay jackets on the ground with sleeves open
- Slide one pole through both sleeves of Jacket A, and the other pole through both sleeves of Jacket B
- Button/zip the jackets if possible so the fabric forms a tighter bed
- Add padding on top (spare layers, sleeping pad segments)
Where people mess up is using flimsy poles or rotten branches. If you can bend it with one hand, it will fold under load. When using wood, pick poles thicker than your wrist.
Tarp-and-pole litter (best comfort-to-effort ratio)
If you have a tarp, emergency blanket with grommets, or a tough groundsheet, you can make a surprisingly solid litter.
Build steps:
- Lay the tarp flat and place poles along the long edges
- Roll the tarp edge over each pole 2-3 times to create “sleeves”
- Tie the rolled sleeves every 12-18 inches with cord/webbing (this prevents the poles from sliding out)
- Add a strap across the tarp at chest and hips to keep the casualty centered
This spreads weight well and reduces pressure points. It also creates clean, predictable handholds.
Pack-frame hybrid (the underused option)
If your group has one or two packs with semi-rigid frames or stiff back panels, you can build a compact litter for short hauls.
A practical approach:
- Empty two packs and lay them side-by-side
- Run trekking poles or sturdy sticks through compression straps or lash points to link them
- Lay a foam pad across the top to bridge gaps
- Strap the casualty to the pad and packs as one unit
This shines on narrow trails where a wide litter won’t fit. It’s not as comfortable, but it can be more maneuverable.
💡 Pro Tip: If you’re choosing between *perfect* and *done*, choose done. A basic tarp-and-pole litter started now usually beats an elaborate build started later.
Now you have a platform. Next, you need to move it over real terrain without the team falling apart.
Moving a Litter Over Real Terrain: Corners, Slopes, and Bearer Rotation
A litter only helps if you can move it without constant resets. The biggest performance gain comes from how you run your team, not the materials you used.
Bearer positions and the “captain” role
Assign one person as the litter captain. Their job is pace, commands, and route calls-not carrying hero weight.
A simple setup:
- Front-left and front-right: set direction, handle step-ups
- Rear-left and rear-right: manage downhill braking and keep the litter level
- Floaters (if available): swap in on rotation, clear brush, manage straps
The captain should walk outside the litter path, scanning for trip hazards and calling “Step,” “Down,” and “Stop.” If everyone is staring at their feet, nobody is looking ahead.
Rotation that prevents collapse at minute 30
Most teams rotate too late. You wait until someone is cooked, then the handoff is sloppy and the litter dips.
Use a planned rotation:
- Rotate every 2-5 minutes on hard terrain
- Rotate at every natural rest platform on easier terrain
- Use the same “down, swap, lift” sequence every time
A clean swap sequence
- Captain calls: “Stop. Down.”
- Set the litter down on a stable platform (not a sidehill)
- New bearers take grips and confirm: “Ready.”
- Captain calls: “Lift. Step.”
This keeps transitions boring-which is exactly what you want.
Switchbacks, tight corners, and narrow bridges
Corners are where improvised litters snag and twist. If you rush them, you’ll torque the litter and slide the casualty.
Use this method:
- Move the litter’s inside rail slightly forward first
- Pivot around the inside rail like it’s a hinge
- Keep the torso centered by tightening hip and chest straps before the turn
For narrow bridges or planks, consider a short carry (2-4 steps) with the litter slightly angled so rails don’t strike the edges. Go slow enough that you can stop instantly.
⚠️ Warning: Don’t “shoulder” one end high to clear brush unless you’ve secured the casualty. A single slip can roll them off.
Once the litter is moving, your next challenge is keeping the casualty stable and warm for the long haul.
Securing the Casualty for Longer Movement (Comfort, Airway, and Heat)
Once you’re on a litter, you’re playing a different game. Tiny problems you could ignore on a 20-yard drag (like a loose shoe or a flopping arm) turn into big problems over half a mile.
Strap strategy: two is one, one is none
If you only have one strap, you’ll re-tighten it constantly. Aim for at least three points of control:
- Chest/upper torso
- Hips/pelvis
- Legs (or at least knees together)
If you don’t have straps, improvise with webbing, belts, jacket sleeves, or torn fabric. Keep knots off pressure points, and avoid tying directly over fractures.
How tight is “tight enough?”
You want the casualty unable to slide, but still able to breathe.
- You should be able to slip two fingers under chest straps
- Re-check after 5 minutes-straps settle as padding compresses
Head management without fancy gear
If you’re worried about head/neck movement, you’re mostly trying to reduce side-to-side wobble.
Quick solutions:
- Put rolled clothing on both sides of the head like bumpers
- Use a hooded jacket stuffed with soft layers as a head cradle
- If you have tape, don’t tape across the mouth-secure padding to the litter, not the face
Also think about vomiting risk. If the casualty is nauseated or semi-conscious, you may need to roll them slightly or turn the entire litter briefly. Keep straps easy to loosen.
Heat retention during movement (the “moving wind tunnel” problem)
A carried casualty gets wind exposure even on mild days. If they’re damp, wind chill ramps up quickly.
What works in the field:
- Put a vapor barrier layer over insulation (rain shell, emergency bivy, tarp wrap)
- Cover from shoulders to feet, then seal gaps at the neck and ankles
- Insulate underneath too-litter fabric alone doesn’t stop conductive heat loss
If you have chemical heat packs, use them carefully and never directly on skin. Place them near the torso (armpits/chest area) rather than hands/feet if hypothermia is a concern.
💡 Pro Tip: If the casualty is shivering hard, treat that like a time limit. Slow, careful movement is good-but only if you’re actively keeping them warm.
With the casualty secured, the last step is turning all these tools into a repeatable workflow you can run under pressure.
Putting It All Together: A Field-Ready Evacuation Workflow
By now, you’ve got a menu of drags, carries, and litter builds. The final step is making it run like a system-especially when stress is high.
A practical decision ladder you can memorize
Use this progression when you’re unsure what to do next:
- Short move to safety (fast drag) if the scene is dangerous
- Controlled drag if manpower is low or terrain is tight
- Assisted walk or short carry for obstacles and transitions
- Improvised litter when distance grows, bumps matter, or you have enough people
You’re not “committing” to one method. You’re matching the method to the next segment of terrain.
Common failure points (and how to avoid them)
These are the mistakes that turn a manageable evacuation into a fiasco.
Failure: The litter flexes and taco-folds.
- Fix: Use stiffer poles, add cross-bracing (short sticks tied between poles), or switch to a pack-frame hybrid.
Failure: The casualty slides downhill on the litter.
- Fix: Tighten the hip strap first, then add a knee/ankle tie. If needed, slightly elevate the foot end with padding rather than lifting the entire litter.
Failure: The team stops communicating and pace falls apart.
- Fix: Re-assign a captain, return to the five commands, and shorten movement intervals.
Next steps you can do before your next trip
You don’t need a full rescue course to improve outcomes, but you do need reps.
Try this at home or at a park (with a willing partner):
- Practice building a jacket-and-pole litter in under 4 minutes
- Do a 200-yard carry with rotations every 2 minutes
- Practice a clean “down, swap, lift” sequence until it’s automatic
Upgrade your kit with tiny additions:
- Two 6-8 ft lengths of 1-inch webbing (light, strong, useful for straps)
- A compact tarp or durable emergency bivy
- A couple of large safety pins or mini carabiners for quick attachment points
When you’re ready, the best multiplier is formal training. Wilderness medicine and rescue courses teach packaging, patient assessment, and team movement under realistic constraints.
If you take only one thing from this whole guide, make it this: choose methods you can sustain, and keep everything boring on purpose-boring means controlled, and controlled means safer.