Shelter Site Selection and Camp Layout: Wind, Drainage, Widowmakers, and Defensive Positioning
Reading Terrain Like a Platoon Sergeant: Macro Site Selection
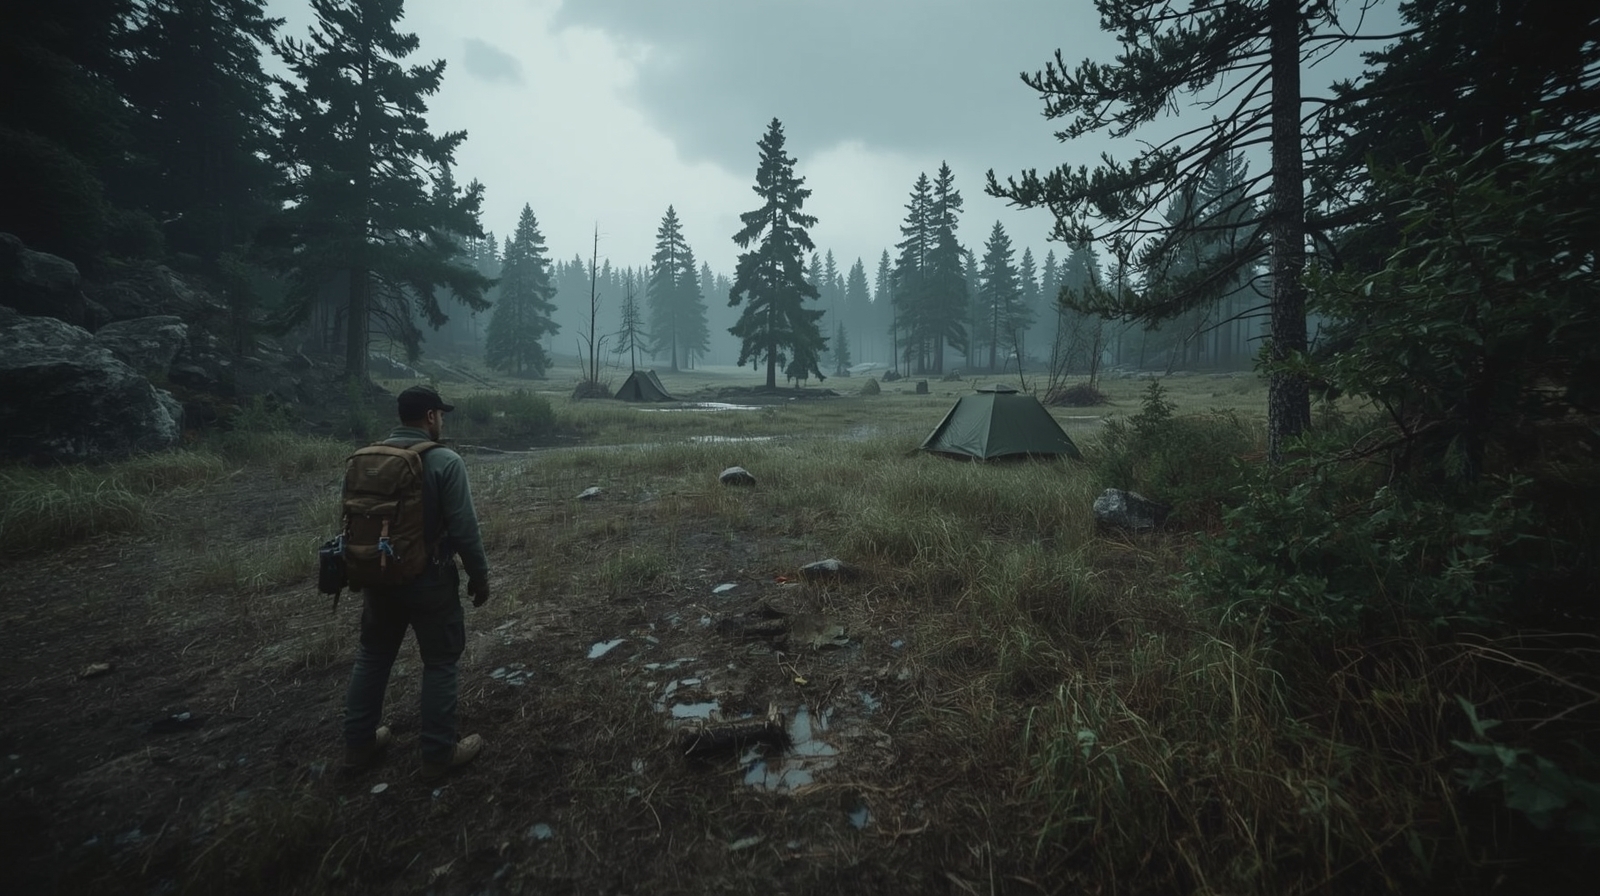
Choosing a site isn’t just about finding something flat. It’s about predicting what the ground and weather will do while you’re asleep, tired, and not paying attention.
Related Articles:
In the field, we used a simple mindset: pick a position that still works when conditions get worse. If the forecast is wrong, if the wind shifts, if it dumps rain at 0200, your camp should remain safe and functional.
Start With the Big Picture: Landforms and Consequences
Before you zoom in on a “nice spot,” take 60 seconds to read the terrain around it. Ridges, benches, saddles, and valley bottoms all behave differently in wind and water.
Valley bottoms collect cold air and fog, and they can turn into drainage channels during heavy rain. High, exposed ridges can get punished by wind, but they often shed water well.
A practical rule: avoid being the lowest point in any bowl-shaped area unless you’re certain it won’t rain. If you can see terrain sloping toward your chosen spot from multiple directions, you’re basically setting up a funnel.
When the weather changes, the landform decides your night, not your tent.
Use an “If I Had to Leave Fast” Test
Your site should allow a quick, safe exit. That’s not paranoia; it’s discipline.
If you slip a guyline, if a tree starts cracking, or if a lightning storm moves in, you need an easy route out. You don’t want your only option to be crawling through brush or sliding down slick rock.
Do a quick lap of the immediate area and identify two routes:
- Route to water (if you’ll need it again before sleeping)
- Fallback route to a safer location if your first choice turns bad
If both routes require steep, loose footing, you’re setting yourself up for a nighttime injury when you’re half awake. This is also where you confirm you’re not camped in a game trail, dry creek bed, or obvious runoff chute.
Quick rule of thumb: If the terrain “forces” you to camp there, it’s often the wrong place. The best sites give you options.
Wind and Weather: Choosing Exposure vs Protection
Once the terrain passes your first filter, wind becomes the next deciding factor. Wind is a comfort issue until it becomes a safety issue.
A steady breeze can reduce condensation and bugs. A gusting crosswind can flatten a poorly pitched shelter, drive rain under edges, and sap heat all night.
The goal is controlled exposure: enough airflow to stay dry inside, but not so much that your shelter becomes a sail.
Predict Wind Behavior Around Ridges and Tree Lines
Wind accelerates over ridgelines and through gaps like saddles. If you camp right on a crest, you’re often sitting in the fastest air.
Dropping just below the ridgeline on the leeward side can cut wind dramatically. It also helps you avoid some of the cold-air pooling that settles lower down.
Tree lines and brush can act like a windbreak, but don’t assume “in the trees” equals safe. Wind swirls at forest edges, and gusts can be turbulent near openings.
If you want a reliable reference for how storms and wind are behaving in your region, check the National Weather Service at weather.gov, then apply what you see to the terrain in front of you.
Align Shelter Orientation to Reduce Failure Points
Point the lowest-profile end of your tent or tarp into the prevailing wind. That one decision reduces flapping and prevents your door from becoming a wind scoop.
It also keeps rain from being driven into ventilation gaps. With tarps, a low “storm pitch” on the windward side and a slightly higher leeward side gives you protection without turning the shelter into a condensation trap.
If the wind is variable, choose a site that blocks the strongest gust direction rather than trying to rotate all night.
A good habit is to tighten guylines after your shelter fabric relaxes (usually 10-20 minutes after pitching). Wind problems often start as small slackness, then become full-on failure at 0300.
Drainage and Water Movement: Staying Dry When it Rains Hard
With wind addressed, you need a plan for water. Most “my tent leaked” stories are really “my site flooded.”
A waterproof floor won’t save you if water is flowing under you or pooling around your sleeping area. Drainage is terrain reading, not gear shopping.
Spot the Bathtub: Micro-Depressions and Soil Clues
Avoid the lowest spot on any flat area, even if it looks perfect. Small depressions become bathtubs under sustained rain.
Look for subtle clues that the ground holds water:
- Darker, compacted soil
- Mossy or saturated patches
- Water-tolerant plants that suggest chronic moisture
- Tiny etched channels (runoff history written in the dirt)
Do a quick “boot test.” Step firmly and twist your heel. If the soil shears easily or squeezes water, you’re already in trouble.
In snow conditions, consider meltwater too. Morning sun can turn a firm platform into a slushy pond.
Don’t Dig Trenches-Use Better Placement
Old-school trenching around tents is still talked about, but it often damages terrain and may violate local rules. Many land managers discourage it, and it can accelerate erosion.
Instead, select naturally draining ground and orient your shelter so runoff passes around it. A slight rise or a gentle side slope with stable soil is usually a better bet than a “perfectly flat” low spot.
For broad guidance on low-impact camping and site selection, review Leave No Trace principles via nps.gov.
The operational takeaway is simple: if your only plan is to engineer the site after you arrive, you chose wrong. Let the land do the work for you.
Widowmakers and Overhead Hazards: Managing the Vertical Threat
After wind and water, look up. Falling limbs and unstable trees are one of the most underappreciated hazards in camp.
In military training, we treated overhead danger like any other threat: identify it, assess it, and avoid it. You can’t “tough out” gravity.
Identify Deadwood, Leaners, and Root Instability
A widowmaker isn’t only a dead branch hanging overhead. It can be:
- A dead standing tree (snag)
- A cracked trunk
- A leaning tree under tension
- A root plate that’s already lifting
Scan above your shelter position and 360 degrees around it. If you see dead limbs with no bark, “hanger” branches caught in the canopy, or a tree with fungus growth and rotten cavities, move.
Check the base too. Soil heaving, exposed roots, or a mound on one side of the trunk can indicate wind-throw risk.
Account for Snow Load, Wind Gusts, and Time of Night
Conditions change overnight. Wind builds, snow loads branches, and freeze-thaw loosens deadwood.
The timing matters, too. The moment you relax and stop scanning is when you’re most vulnerable.
A safe site in calm afternoon weather can become dangerous after midnight gusts. If you must camp in trees for wind protection, choose younger, flexible stands rather than old, brittle timber.
Avoid camping directly under heavy lateral limbs. As a habit, look up before you drop your pack. That one discipline prevents a lot of bad outcomes.
Quick reference: If you wouldn’t park your car under that tree in a storm, don’t sleep under it.
Ground Surface and Micro-Topography: Comfort, Heat Loss, and Footing
Once you’ve handled wind, water, and overhead threats, the ground itself becomes the next limiter. Comfort matters because poor sleep compounds mistakes.
From an operational perspective, comfort is performance. You make better decisions when you’ve actually rested.
Choose Insulating Surfaces and Avoid Heat Sinks
Bare rock can be flat and drain well, but it can also suck heat out of you. Damp soil does the same.
Pine duff and dry leaf litter can insulate, but they may hide roots and create uneven pressure points. Your sleep system can compensate, but site selection is your first layer of insulation.
If you’re camping in cold conditions, avoid low spots where cold air pools overnight. Even a 10-20 foot elevation difference on the same hillside can change temperatures noticeably.
In warm climates, you may actually want a light breeze and slightly elevated ground to reduce humidity and insects.
Confirm Footing for Night Movement and Bad Weather
You will get up at night. If your site requires stepping onto slick roots, talus, or steep slopes, you’re increasing the risk of a fall when your coordination is low.
Map your “night route” from shelter to bathroom area and back. Clear small trip hazards if allowed, but don’t strip the area bare.
Also consider where rain will flow when you step outside. You don’t want to exit your shelter into a puddle or slick mud.
A good camp feels easy to move around in, even with a headlamp on low and your hands full.
Defensive Positioning Without Looking Like a Fort: Security, Lines of Sight, and Noise/Light Discipline
Now that your site is physically safe, think about awareness and control. Most camping isn’t tactical, but smart positioning keeps you safer in remote areas.
It helps you manage wildlife encounters, unexpected human traffic, and the simple vulnerability of being asleep outdoors. The goal is low-profile awareness, not building a fortress.
Balance Visibility, Concealment, and Access Routes
If you’re near trails, roads, or popular water sources, consider setting back far enough to avoid being directly seen. At the same time, keep a clean line of sight to the approach you care about.
Thick brush can conceal you, but it can also block your awareness. In the field, we avoided “dead space” close to our position-areas we couldn’t observe without moving.
For you, that translates to this: don’t camp where someone (or an animal) can walk up within a few yards unseen. Favor a site with a natural view of likely approaches, like a gentle rise or an open understory.
Practice Simple Camp Discipline That Prevents Problems
Noise and light discipline aren’t just for the military. They reduce unwanted attention and preserve your own night vision.
A few habits that pay off immediately:
- Keep headlamps pointed down and use the lowest setting that works
- Set up before it’s fully dark so you’re not crashing around later
- Stage critical items the same way every time (so you can find them half-asleep)
Also keep “critical items” staged consistently: shoes, headlamp, layers, and a way to signal or defend yourself (depending on your environment and legal considerations).
The defensive advantage is not being surprised and not fumbling. A tidy camp is a safer camp.
Camp Layout for Solo and Small Teams: Zones, Workflow, and Safety
Once you commit to a site, layout is where you turn a patch of ground into a system. A camp layout should reduce confusion.
When you’re tired, you default to habits. Build a layout that supports good habits automatically: clear paths, separate hazards, and predictable gear placement.
This matters even more in rain, snow, and darkness.
Build Three Simple Zones: Sleep, Cook, and Admin
Think in zones. Your sleep zone is shelter and sleep gear only. Your cook zone is stove, food handling, and eating.
Your admin zone is where you pack, check feet, manage water treatment, and stage gear for tomorrow. This is also where you keep small essentials so they don’t drift into the dirt.
Separating zones prevents common failures:
- Spilled food in your shelter
- Fuel canisters too close to flame
- Muddy boots contaminating your sleep setup
It also helps with wildlife hygiene, since food smells stay away from where you sleep. Even solo, you’ll feel the difference immediately.
Use Spacing Rules That Still Work in Bad Weather
Distances don’t need to be perfect, but they should be intentional. Here’s a practical spacing reference you can scale to your environment:
| Camp Element | Typical Distance | Why It Matters |
|---|---|---|
| Shelter to cooking area | 50-100 yards (wildlife country), 30-50 yards (low-risk areas) | Reduces food odor at sleep site |
| Shelter to latrine/bathroom area | 200 feet minimum (or per local rules) | Hygiene, water protection |
| Cooking area to water source | Close enough to carry safely, not on the bank | Prevents spills/erosion |
When weather is severe, you may compress distances for safety. If you do, compensate with cleanliness: strict food handling and faster cleanup.
Fire, Cooking, and Food Storage Placement: Smoke, Sparks, and Critters
With your zones set, dial in the highest-risk area: cooking. Your cooking setup is one of the most hazard-prone parts of camp.
That risk comes from flames, fuel, carbon monoxide, and animals. Set it up like you expect something to go wrong, because eventually it will.
Place Stoves and Fires With Wind and Fuel in Mind
Wind turns small flames into problems fast. If you’re using a stove, shield it from wind without enclosing it.
Never run a stove in a tent or poorly ventilated shelter. Carbon monoxide is a silent, fast-moving threat.
If you build a fire (where legal), keep it downslope and downwind from your shelter so smoke and sparks don’t blow into your sleep area.
Control combustibles:
- Clear a reasonable area to mineral soil if permitted
- Keep extra fuel staged away from flame
- If wind starts gusting, put the fire out early instead of waiting for a near-miss
Store Food Like You’re Sharing the Woods With Professionals
Animals are relentless, and you don’t want them associating camps with easy calories. Use bear-resistant canisters where required, or hang food correctly if that’s accepted in your area.
A sloppy hang is worse than none because it creates false confidence. The animal still gets rewarded, and you get a mess.
Follow local guidance for food storage. Many parks publish clear requirements; check the relevant regulations before you go.
If you want a solid baseline for bear country practices, the National Park Service overview of bear safety is a good starting point: nps.gov/subjects/bears/safety.htm.
The camp-layout tie-in is simple: cook clean, store smart, and keep smellables out of your shelter.
Sanitation and Water Points: Latrine Siting, Gray Water, and Hygiene
Sanitation is site selection too. Poor hygiene placement contaminates water, attracts animals, and makes your camp feel worse every hour you stay.
Done right, it’s almost invisible and doesn’t become a constant annoyance. It also prevents the slow creep of “camp grossness” that kills morale on longer trips.
Protect Water Sources With Distance and Drainage Awareness
Keep human waste and gray water away from water sources and away from drainage lines that lead to water. Even if a creek is dry today, it can run hard after an overnight storm.
Use these simple placement rules as a baseline (always follow local regulations first):
- Keep bathroom areas at least 200 feet from lakes, streams, and trails
- Avoid low gullies, dry creek beds, and obvious runoff channels
- Choose soil that can be dug (if you’re using catholes) and that drains reasonably well
For gray water, strain food particles, pack them out where required, and scatter strained water over a wide area away from camp.
A clean sanitation plan protects your water, reduces smells, and keeps animals from getting curious about your routine.