Improvised Gear Repairs in the Backcountry: Field Fixes for Packs, Boots, Tents, and Clothing
Build a Repair Mindset Before You Touch Anything
When something breaks in the backcountry, your first job isn’t “fix it fast.” Your first job is to stop the damage from spreading. That means you pause, unload stress from the broken part (take the pack off, unlace the boot, lower tent tension), and look for what’s actually failing-fabric, stitching, hardware, or an adhesive bond.
Related Articles:
A useful rule is: stabilize → reinforce → protect.
- Stabilize puts the piece back where it belongs.
- Reinforce adds strength so it stays there.
- Protect keeps grit, water, and movement from undoing your work.
Do a 60-second field assessment
Before you pull out tape, run a quick scan. This saves time because you’re solving the right problem, not just the loudest one.
Ask yourself:
- What forces are involved (tension, shear, bending, abrasion)?
- What’s the cleanest, driest surface you can create right now?
- What’s your time horizon: 1 hour, 1 day, or “finish the trip”?
- What’s the consequence if the fix fails (wet sleep system, blistered foot, lost food)?
If your shelter is compromised in bad weather, prioritize getting it functional even if it looks ugly. The National Weather Service explains how fast conditions can escalate and why staying dry matters for safety (NWS outdoor weather safety).
Use the right “direction” of strength
A lot of field repairs fail because the reinforcement is placed in the wrong orientation. Tape and fabric patches are strongest when they span beyond the tear and distribute load into intact material. Cord and zip ties are strongest when they form a closed loop, which is less likely to slip.
📝 Quick Summary: Slow down, remove tension, identify the failure mode, and build repairs that spread force into undamaged material.
Assemble a Minimal Repair Kit That Actually Solves Problems
A repair kit works best when it’s built around functions-bonding, stitching, splinting, and replacing hardware. It’s tempting to bring one “miracle” product, but that usually fails when conditions change (wet fabric, cold hands, constant movement).
You don’t need a full workshop. You just need a small set of tools that can cover the most common failure modes.
The core items worth their weight
Here’s a practical starter list that covers most pack/boot/tent/clothing failures:
- Tape: Tenacious Tape (or similar) plus a short wrap of duct tape
- Needle + thread: a sturdy needle and dental floss or heavy polyester thread
- Cordage: 2-3 mm accessory cord or strong guyline (a few meters)
- Fasteners: zip ties (mixed lengths), one mini carabiner, and a safety pin or two
- Patch material: a small scrap of nylon or silnylon (even a cut piece of an old stuff sack)
- Tool: a small knife or multitool (scissors help a lot)
If you want to upgrade without adding much weight, add:
- Alcohol wipes for surface prep
- A small tube of urethane adhesive (Seam Grip-style) for high-strength bonding
At-a-glance: what each item is best at
| Item | Best For | Weak Spot | Pro Tip |
|---|---|---|---|
| Tenacious Tape | Tent fly tears, jacket rips, pack fabric | Needs decent surface prep | Round patch corners so they don’t peel |
| Duct tape | Temporary splints, quick abrasion guards | Adhesive can creep in heat | Use it as an outer layer over stronger tape |
| Dental floss | Stitching webbing, thick fabrics | Can saw through ultralight fabric | Back it with a patch or sew through webbing only |
| Zip ties | Broken buckles, frame stays, lash points | Can snap in cold | Use two in parallel for redundancy |
| Cordage | Guyline replacement, boot lace, pack strap | Knots can slip when wet | Add a stopper knot and leave long tails |
💡 Pro Tip: Store tape on baking paper or wrap it around a trekking pole section. You’ll be able to peel it cleanly without destroying the roll.
Now that you’ve got a workable kit, you can start making repairs that actually hold.
Master Tape-and-Patch Repairs (The Fastest Way to Save a Trip)
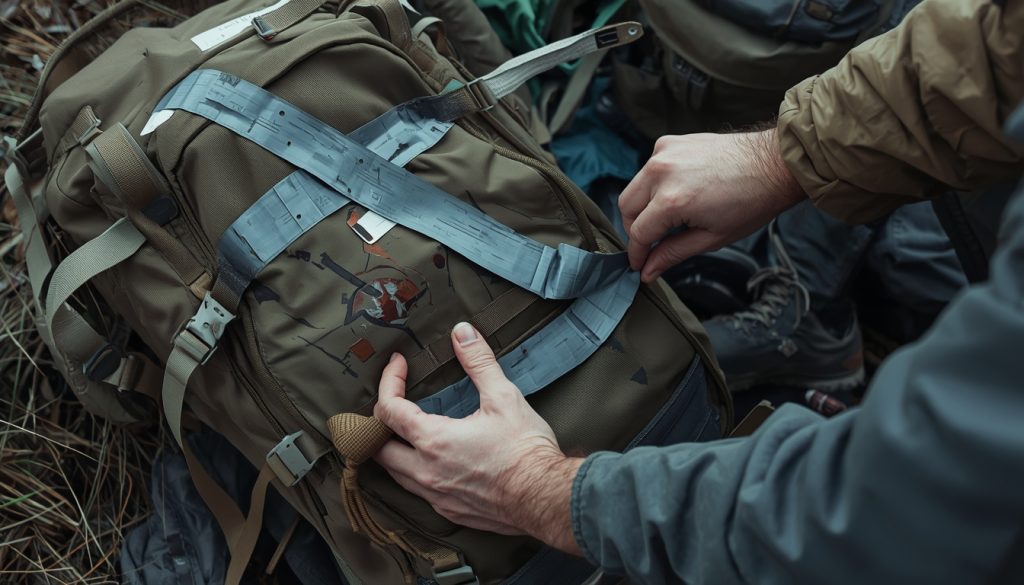
If you learn one skill first, make it patching. Tape repairs are fast, don’t require fine motor skills, and work on packs, tents, rain gear, insulated jackets, and even boots (as a short-term abrasion layer).
The biggest difference between a patch that lasts and one that peels in 10 minutes is prep. You’re aiming for “good enough” adhesion in messy, windy, cold conditions.
Surface prep that makes tape stick in the real world
Tape fails when it’s applied to dirty, wet, or textured surfaces. Use this quick process to improve your odds:
- Dry it as much as possible. Shake water off, then blot with a bandana.
- Clean it. Use alcohol wipes if you have them. If not, use clean water and give it a minute to air dry.
- Flatten the area. Press fabric onto something firm (a cook pot lid, a map case, even your thigh).
- Round patch corners. Sharp corners lift first.
This matters most on tents because wind loads can turn a tiny peel into a long rip. The National Park Service also emphasizes how quickly backcountry problems compound when conditions turn bad (NPS backcountry camping basics).
The “inside-out” patching method (stronger than one patch)
When you can reach both sides of fabric (pack body, tent wall), a two-sided patch is dramatically stronger.
- Apply a patch inside first. Press firmly from the center outward.
- Apply a slightly larger patch outside.
- For long tears, add a third “spine” patch that runs along the rip.
⚠️ Warning: Don’t tension the fabric while applying tape. If you tape a stretched panel, it will wrinkle and peel when the fabric relaxes.
With patching handled, the next step is rebuilding structure when fabric isn’t the main issue.
Use Cordage, Knots, and “Splints” to Replace Lost Structure
When fabric isn’t the problem-when structure is-cordage and splinting become your best tools. Think broken pack straps, snapped tent pole segments, or a boot that needs stabilization.
In plain terms, you’re building a temporary exoskeleton that carries load around the failure. Done right, it won’t just “hold.” It’ll hold while moving.
Choose knots that hold under movement
You don’t need a knot encyclopedia. You need a few knots you can tie when your hands are cold and your cord is wet:
- Bowline: creates a fixed loop that won’t cinch tighter under load
- Trucker’s hitch: gives mechanical advantage for tightening guylines
- Double fisherman’s knot: reliably joins two cords
- Clove hitch (with backup): fast attachment to poles or pack frames
If you want a deeper, standards-based reference for rope and cord concepts (load paths, abrasion, redundancy), the UIAA publishes relevant safety standards (UIAA safety standards). You’re not climbing with repair cord, but the principles transfer.
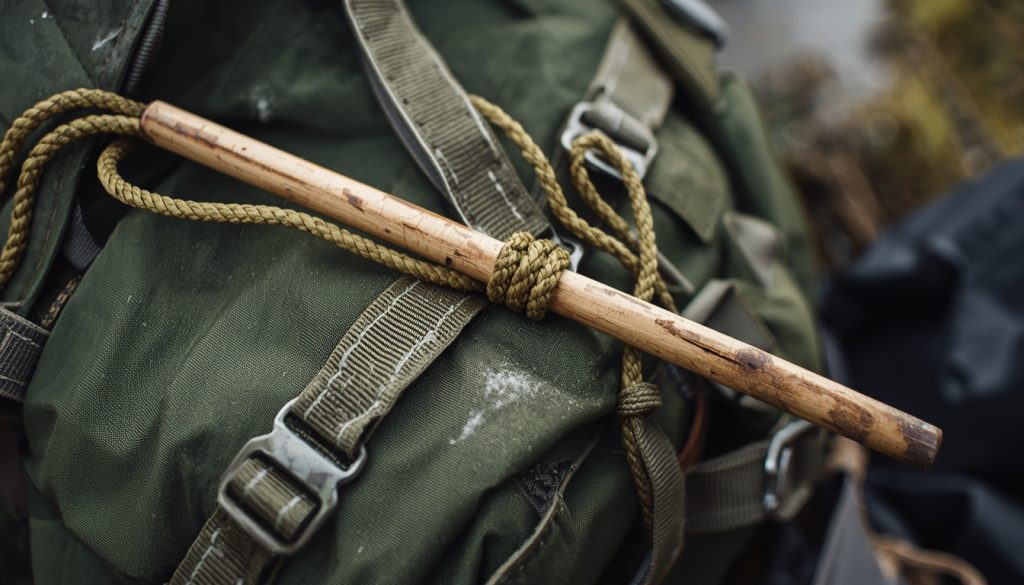
The backcountry splint concept (poles, stays, and buckles)
A splint repair is just rigid-ish material + compression + redundancy. Common splints include:
- A tent stake or short stick
- A spare tent pole section (or the intact half of a broken one)
- A spoon handle (in a pinch)
To splint a broken strap anchor or damaged pole segment, place the splint along the weak area, then bind it tightly with tape, cord, or zip ties. If you’re using zip ties, use two ties offset so if one snaps, the other holds.
📝 Quick Summary: Cord and splints are for structure. Tape and patches are for fabric. When in doubt, combine them.
With those basics nailed, you can start solving the repairs that matter most for forward progress.
Start With High-Value Repairs: Packs and Clothing That Keep You Moving
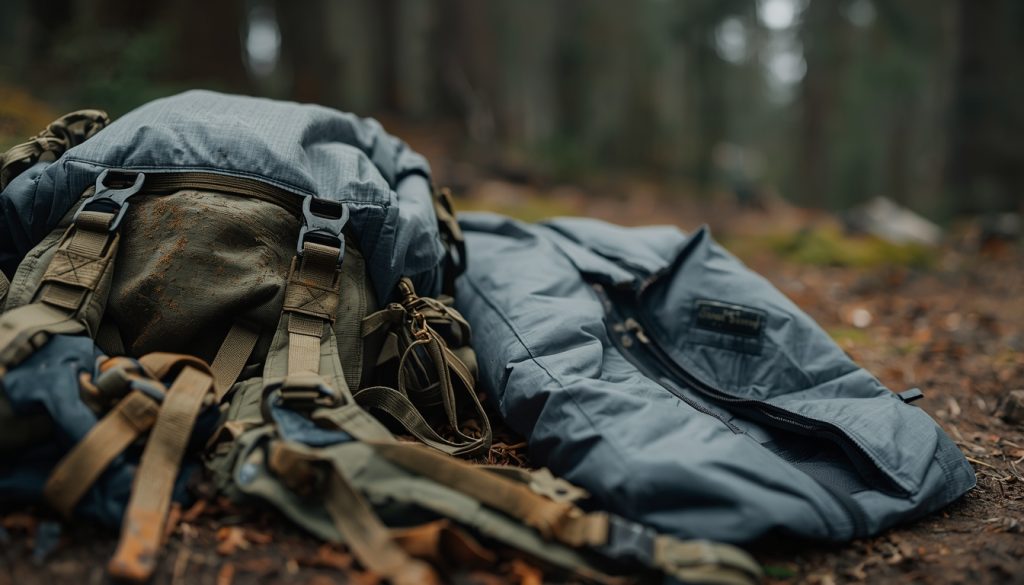
Before you tackle tents and boots (which get trickier fast), it helps to practice on gear that fails most often: packs and clothing. These repairs are usually lower-risk, and you can test them immediately while hiking.
You’re also more likely to spot these issues early. A fraying strap or small jacket rip usually gives you warning before it becomes catastrophic.
Quick pack fixes: straps, seams, and buckles
Pack failures tend to be load-related. If a shoulder strap seam starts blowing out, don’t wait-every step makes it worse.
Start by reducing stress:
- Tighten your hip belt so it carries more weight
- Repack heavy items close to your back
- Loosen or reroute anything pulling awkwardly
Then use one of these fixes:
- Blown stitching on a strap: Sew a simple box stitch through webbing (not just fabric) using floss. Cover with tape to reduce abrasion.
- Broken buckle: Bypass it by tying webbing with a bowline or using a mini carabiner as a substitute clip point.
- Torn pack fabric: Use a two-sided patch. If the tear is on an edge/corner, wrap a folded patch around the edge for extra bite.
Clothing triage: stop heat loss and stop the tear from running
Clothing repairs are often about controlling damage, not making it pretty. If your puffy jacket snags and feathers start leaking, pinch fabric together and tape the hole immediately.
For rain gear, focus on restoring a continuous barrier. A well-prepped tape patch over a puncture is usually enough to finish a trip.
Field Repair Checklist (packs + clothing):
- [ ] Remove tension (take off pack, unzip jacket)
- [ ] Align tear edges (avoid overlap unless necessary)
- [ ] Patch inside first when possible
- [ ] Reinforce high-abrasion spots with an outer layer
- [ ] Re-check after 10-15 minutes of movement
This is where most hikers start feeling confident. Then you hit the harder problems: boots failing under body weight and shelters that must survive hours of wind and rain. That’s where we’ll go next.
Stop Boot Failures Before They Wreck Your Feet
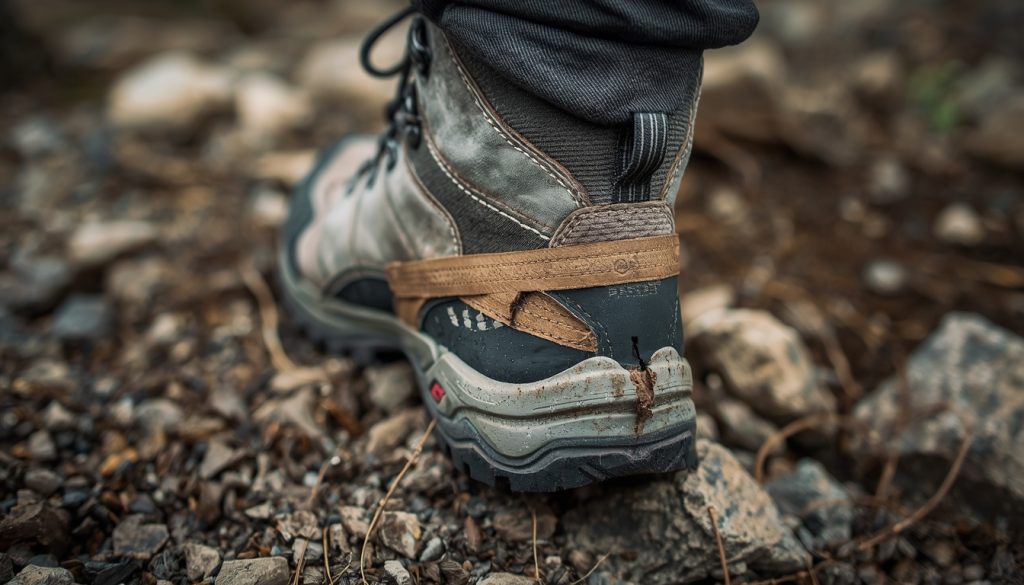
Boot problems are high-stakes because every step tests your repair. If you feel heel “slap,” the outsole flexing oddly, or a sudden squish of water where it shouldn’t be, treat it like a developing failure.
Your goal isn’t perfection. Your goal is a boot that stays stable and predictable so you don’t change your gait and create blisters or knee pain.
Handle sole separation (the classic delamination)
If your outsole is peeling away, don’t just tape the gap and hope.
Do this instead:
- Clean out grit with a stick or the tip of a knife.
- Dry the area as best you can.
- If you have urethane adhesive, add a thin bead into the separation.
- Press the sole back in place and hold it shut.
Now add a “belt.” Wrap duct tape (or strong tape) around the boot and under the sole in tight passes, like strapping a package.
If tape won’t stick because the boot is wet or muddy, use cordage as a wrap-around tie and secure it with a square knot plus backups.
Stabilize a failing heel counter or midsole
If the boot still feels unstable, create a simple brace. Put a flat splint (trimmed stick, tent stake, stiff spoon handle) along the outside of the ankle/heel area.
Bind it with tape in a figure-eight. It won’t look good, but it can reduce wobble enough for the hike out.
⚠️ Warning: Don’t overtighten wraps around the ankle. If your toes tingle or your foot turns cold, loosen immediately.
Once the boot is structurally “walkable,” your next issue is keeping it secured.
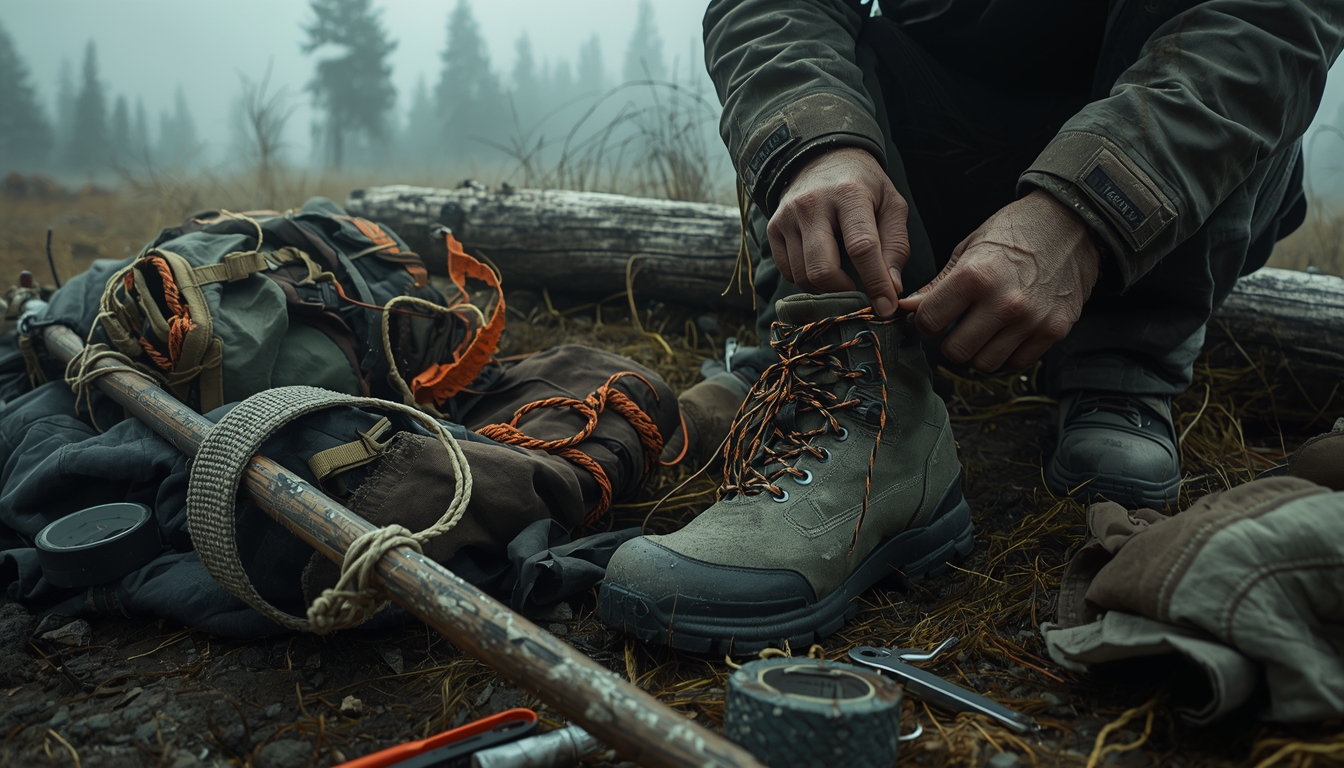
Replace Laces and Hardware When the Closures Give Out
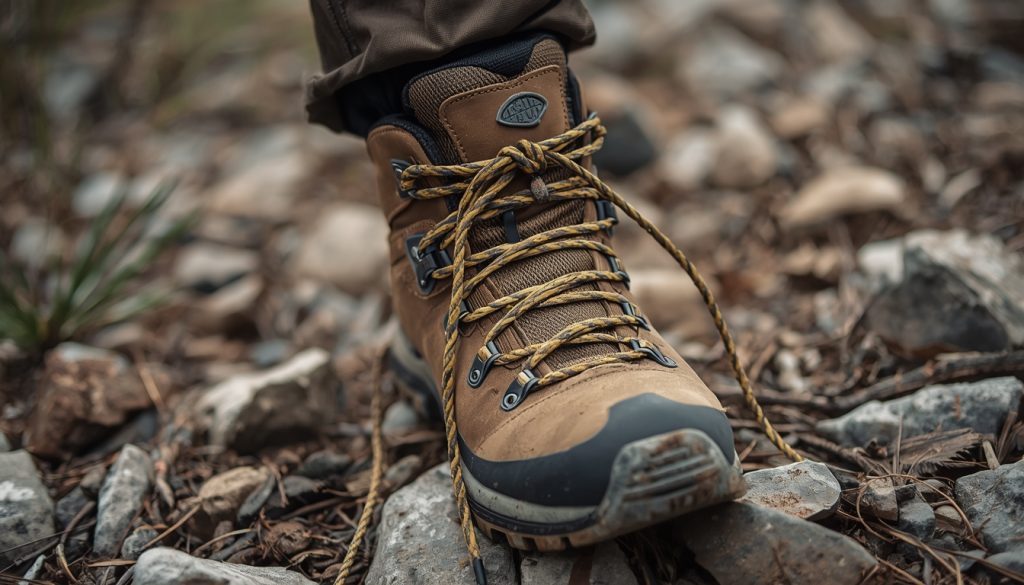
Lace and hardware failures don’t sound dramatic-until your foot starts sliding forward on descents. Once your lacing system can’t hold tension, you’re more likely to get hot spots, bruised toenails, and rolled ankles.
The fix is usually quick. You just need the right approach for the type of failure.
When a lace snaps (and you don’t have a spare)
If you have cordage, replace the lace with 2-3 mm line. Thread it through the lowest eyelets first, then work upward.
Cord is slicker than most laces, so add extra friction at the top hooks. A simple double wrap (surgeon’s knot style) usually keeps tension better.
No cordage? Your best backups are:
- Paracord inner strands
- A tent guyline
- A long strip torn from fabric (short-lived, but it works temporarily)
When an eyelet or speed hook pulls out
This is common on older boots and trail runners with fabric loops. The key is to bypass the broken point while keeping heel lock.
Try one of these:
- Skip the failed eyelet and re-lace around it.
- Use a safety pin to create a temporary lace point through reinforced fabric (avoid thin mesh).
- Tie a small loop of cord through a nearby intact lace hole, then lace through that loop.
📝 Quick Summary: If you can maintain heel lock and even tension, you can usually prevent the foot damage that ends trips.
With your boot holding together, it’s time to make sure the repair doesn’t create new problems.
Manage Moisture, Hot Spots, and Gait Changes After a Repair
A field repair isn’t “done” when it holds for five minutes. Boot and clothing repairs often create new pressure points and new ways for moisture to enter.
Plan on a short test walk and a foot check. That’s how you catch issues early-before they turn into blisters.
Do a 10-minute shakedown (and adjust early)
Walk for 10 minutes on real terrain-uphill, downhill, and sidehill if possible. Then stop and check:
- New rubbing where tape edges, knots, or braces sit
- Heel slip (even mild slip adds friction fast)
- Toe pressure that wasn’t there before
If you feel a hot spot, treat it immediately. The CDC emphasizes early attention to skin irritation to prevent it from becoming a bigger injury (CDC blister prevention and foot health guidance).
Keep grit and water from undoing your boot fix
Once a boot starts failing, grit is your enemy. It works into tape edges, cord wraps, and seams.
If you can, add an outer sacrificial layer (a final tape wrap you expect to replace later). In wet conditions, focus on drainage and dryness instead of trying to make a wrecked boot waterproof again.
Change socks when you can. Dry your feet during breaks. At camp, loosen wraps slightly to restore circulation.
Next up: keeping your shelter standing when wind, rain, or broken parts try to turn your night into an emergency.
Keep Your Shelter Standing: Pole Breaks, Stakes, and Guyline Failures
Shelter failures feel urgent because they usually happen when the weather is getting worse. The good news is tent structure repairs are mostly mechanical-you’re re-creating stiffness and tension.
Treat it like building a simple frame. Keep the tent upright first, then deal with leaks.
Splint a broken tent pole section the right way
If a pole segment cracks or snaps, align it straight and splint it. Ideally, slide a repair sleeve over the break (many tents include one).
No sleeve? Improvise with a tent stake, a short stick, or even the handle of a toothbrush.
Bind tightly with tape or zip ties:
- One binding on the center of the break
- Two more bindings about 1-2 inches to each side
This spreads load and helps prevent the pole from hinging at the weak point.
Replace missing stakes and restore tension
If a stake bends or disappears, don’t accept a floppy tent. Carve a stick stake (pointed end, notch near the top) and drive it at an angle.
If the ground is too rocky, use a deadman anchor:
- Wrap your guyline around a rock, or
- Bury a stick/log horizontally and tension the line against it
If a guyline snaps, tie in a replacement and re-tension with a trucker’s hitch. A tight shelter sheds wind better and reduces flapping that can tear fabric.
With structure restored, you can finally focus on keeping water and bugs out.
Control Leaks and Tears in Tent Floors, Rainflies, and Bug Nets
Once the tent is upright, the next battle is water and wind finding weak points. Tears grow fast when fabric flaps, and leaks often start at stress points like corners and tie-outs.
You don’t need a showroom repair. You need a repair that survives gusts, packing cycles, and abrasion.
Patch rainfly and floor punctures under real conditions
For a floor puncture:
- Remove sharp debris.
- Dry the area.
- Patch the inside if you can (it’s less likely to abrade).
If you must patch from the outside, add a second protective layer-especially if you’ll be camping on gravel.
For rainflies, patch both sides if possible and keep the panel relaxed while you apply. After patching, re-tension slowly and watch for edge lift.
Reinforce tie-outs and stop small tears from “running”
Tie-outs and corners take concentrated load. If a tie-out is ripping free, don’t just tape the rip.
Instead, create a new attachment point:
- Sew or tie a loop of cord through stronger nearby fabric (or around a seam)
- Attach your guyline to that loop
If bug netting tears, tape can work briefly but often peels on mesh. A better fix is to stitch it closed with small, tight stitches, then reinforce the non-mesh border with tape if available.
That gets you through the most common “keep moving” and “stay sheltered” failures. Next comes the finicky stuff-zippers, seam leaks, shredded anchors, and stronger repairs that hold for days.
Fix Zippers and Hardware Without Destroying the Fabric
Zippers are one of those failures that can spiral fast. A jammed tent door becomes a torn mesh panel, and a broken jacket zipper can mean a cold, windy night.
The trick is to treat the zipper as a system-teeth, slider, and zipper tape-not just “the part that won’t move.”
Un-jam and re-seat a zipper slider in the field
If a zipper is stuck, don’t yank. First, reduce tension by slackening the fabric (open the tent panel, relax your jacket hem). Then work the jam backward slowly.
If the slider is misaligned (one side climbing higher), pinch it gently with a multitool to tighten it a hair. Tiny changes matter.
Run it a few inches, back it up, then run it forward again. That “training” often re-seats it.
When the slider is gone or the stop breaks
If the slider walks off the end because a stop popped, improvise a stop with a tight wrap of thread/floss or a small zip tie at the end of the zipper tape.
If a zipper pull breaks, tie a short loop of cord or use a small split ring. You’ll still be able to operate it with gloves.
💡 Pro Tip: If you’re forced to “close” a tent door with a failed zipper, don’t tape the mesh. Tape the *zipper tape* (the fabric edge) to reduce tearing and make cleanup easier later.
Once zippers are handled, the next step is upgrading repairs in the places that carry the most load.
Make High-Strength Stitch Repairs on Webbing, Seams, and Anchors
When stitching fails on load-bearing areas-pack shoulder straps, hip belts, tent tie-outs-tape alone usually isn’t enough. You need thread that won’t snap and a stitch pattern that won’t rip through the material.
Your goal is to rebuild a load path. Pretty comes later.
Use a load-friendly stitch pattern (even with a basic needle)
For webbing and strap anchors, aim for a box-and-X or repeated bar tacks. If you can’t punch through thick layers easily, sew through webbing and existing reinforced seam allowances instead of thin fabric panels.
Keep stitches short and evenly spaced. Finish with multiple knots.
Then flatten the knots under tape to reduce abrasion against your clothing.
Create a new anchor point when the original is shredded
Sometimes the fabric around an anchor is too damaged to sew. In that case, move the anchor to stronger material nearby.
- For tents: tie a cord loop around a pole sleeve seam or reinforced corner, then clip your guyline to that loop.
- For packs: route cordage around a frame-stay channel or daisy chain, then use that as the new strap attachment.
⚠️ Warning: Avoid sewing through waterproof-breathable membrane layers unless you have to. Needle holes can leak; if you do sew, plan to seal later.
If stitching creates structure, adhesives create staying power-when conditions cooperate.
Use Adhesives and Seam Sealing Like a Pro (Even When It’s Cold)
Adhesives are the closest thing you’ll get to a “real” repair in the backcountry, but they’re picky. They hate dirt. They hate movement while curing. Cold temperatures slow everything down.
If you respect those limitations, urethane-based glues and seam sealers can save a boot, a tent floor, or a rain jacket.
Get better bonding with simple prep and controlled pressure
Do three things before you glue: clean, dry, and clamp.
- Clean with an alcohol wipe if you have one. If not, use water and dry thoroughly.
- Apply a thin layer (more glue is not stronger).
- Press parts together and create pressure.
To clamp without clamps, use what you already have: wrap with tape, lash with cord, or pin between two flat objects inside your pack. If it’s cold, warm adhesive in a pocket for 10 minutes first.
Seal seams and micro-leaks when tape won’t hold
Seam leaks often show up as “mystery dampness” at 2 a.m. If your rainfly seam is weeping and you have seam sealer, paint a narrow bead along stitching on the inside of the fly when possible.
No seam sealer? You can still reduce leaking by:
- Increasing fly tension
- Adding a drip line (short cord tied to a guyline below the leak point)
- Redirecting runoff away from doors and vents
📝 Quick Summary: Adhesives work best when you can immobilize the repair. If it must flex immediately (like a boot toe crease), lean on wraps and stitching first.
With higher-strength fixes available, it’s worth understanding why certain repairs fail repeatedly.
Avoid the Failure Loop: Why Field Repairs Don’t Last (and How to Fix That)
When a repair fails repeatedly, it’s almost never because you “didn’t use enough tape.” It’s usually because the underlying forces weren’t reduced-or the fix introduced a new weak point.
A slightly more analytical approach pays off here. You’re not just repairing. You’re managing stress.
Reduce load and abrasion before you “upgrade” the repair
If a pack strap repair keeps tearing, you may simply be carrying too much on that strap. Rebalance your load:
- Move heavy items closer to your back
- Tighten the hip belt so it carries more
- Lash part of your load externally for short stretches if needed
For tents, if a patched panel keeps ripping, the issue may be flapping. Add guyline support, adjust stake angle, or pitch behind natural windbreaks to lower stress on the patch.
Watch for these common repair mistakes
- Patching only up to the tear edge (you need overlap into intact fabric)
- Wrapping tape around dirty, wet, gritty surfaces (it will peel within miles)
- Overtightening boot wraps and cutting circulation
- Creating hard “edges” that cause new rubbing (tape corners, knots, zip tie heads)
⚠️ Warning: If repair failure creates escalating risk-loss of shelter in dangerous weather, inability to walk safely-your smartest “repair” may be turning around early.
Once you know what causes repeat failures, you can build a routine you’ll actually follow under stress.
Put Your Skills Into a Repeatable Backcountry Repair Routine
At this point you’ve got the tools: patching, splinting, stitching, tension management, and adhesive strategies.
What makes you reliable in the backcountry is a routine you can run even when you’re tired, cold, or rushed.
A simple order of operations that prevents panic repairs
Use this sequence whenever something breaks:
- Stabilize: remove tension, unload weight, stop flapping, get out of the wind.
- Rebuild function: make it usable first (close the shelter, secure the pack, keep the boot wearable).
- Reinforce: add structure (splints, cord loops) and strength (stitching, “belt” wraps).
- Protect: cover knots, tape edges, and abrasion zones.
- Test and re-check: short walk or wind test, then re-check after 15 minutes.
Practical next steps before your next trip
- Pack a repair kit you can use with gloves and cold hands.
- Practice one stitch pattern and two knots at home until you can do them without thinking.
- Do a quick “stress check” before leaving: tug on tie-outs, inspect boot soles, and look for fraying webbing.
If you do those things, most gear failures become a delay-not a disaster. You’ll keep moving, stay sheltered, and finish trips with confidence.